Kids First Saturdays: Making Faces Iv
This week, we go over the last steps to creating a mask using coloured media. This is one of the activities, along with making your own zine publication, taking place during our in-gallery Kids First programming on Saturday, November 7th 2020.
Advance registration for Kids First programming can be done by emailing kidsfirstsaturdays@thepolygon.ca and same-day registration should be done by telephoning the admissions desk at 604-986-1351. Our new Covid-19 plan ensures a safe experience for all.
For anyone visiting the gallery from September 4th to November 8th 2020, download and print this ‘Seek and Find’ document before your visit, to help you look closer at the artworks in the exhibition. Or, use your personal device to look at the sheet as you go through the exhibit with your family.
INSPIRATION
Over the past few months, we have explored the artistic practice of 8 artists from the Third Realm exhibition. This last instalment will consider the work of Jompet Kuswidananto as he explores the effects of colonialism in his native Indonesia by looking at how outside influences transform the cultural fabric of his country.

Jompet Kuswidananto, Still from Body of God (2011), courtesy FarEastFarWest collection
For example, the above image is a video still from a piece titled Body of God (2011). In this video, the artist slowly removes a mix of traditional Javanese costume elements, and a pop-culture plastic mask, as a way of exploring the transitional state of Indonesian culture due to the influx of a new globalized culture.
In a similar way, we will be learning how to add coloured elements to a face-mask, as a way of exploring how the human face and face coverings figure in contemporary art.
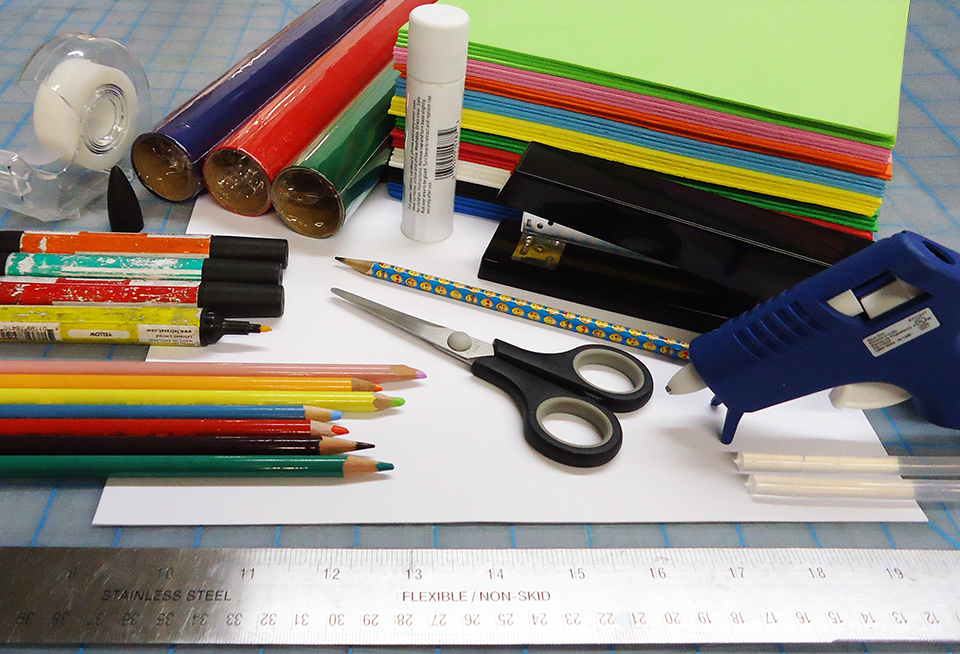
STEP 1: GATHER MATERIALS
- Coloured construction paper and/or white paper, 8.5 X 11 inches
- Coloured cellophane and/or tinfoil
- Coloured foam sheets, 8.5 X 11 inches
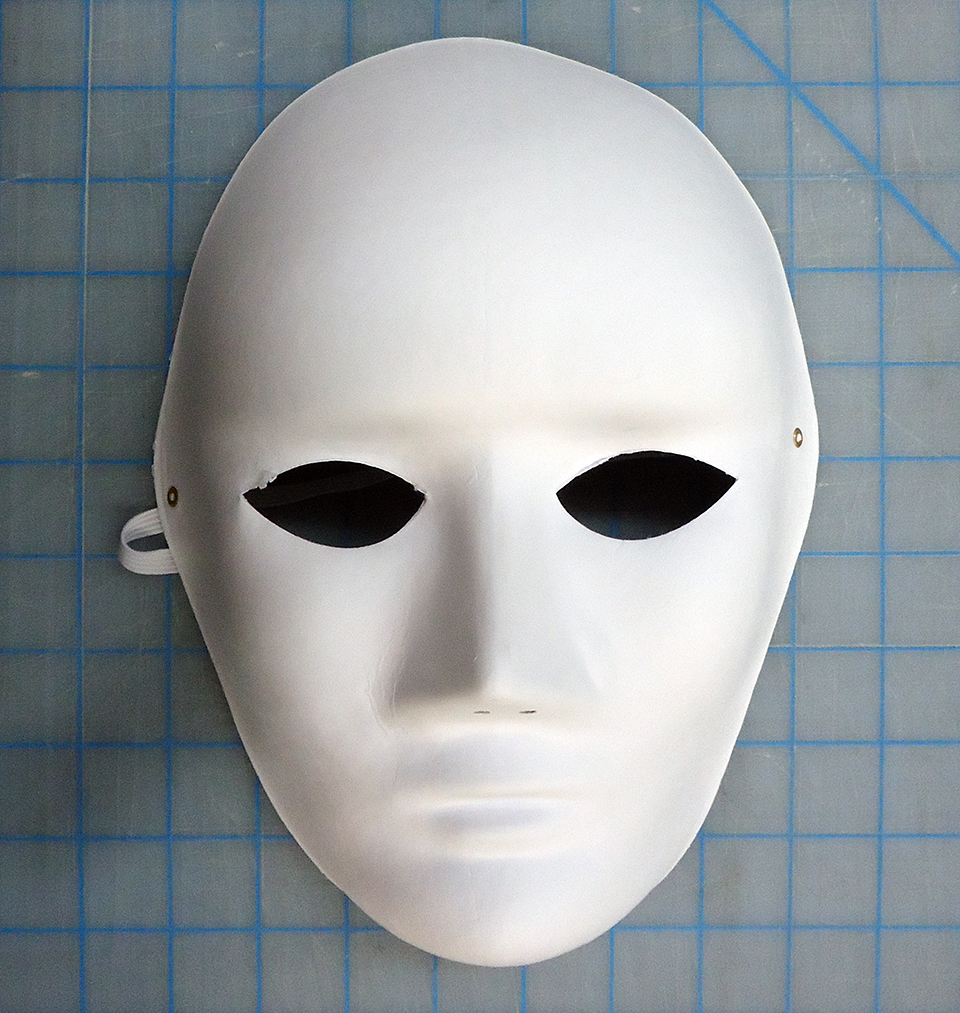
- A neutral theatre mask, made from paper (available in most craft/art-supply stores; plastic masks are also an option for the mask-making instructions found on this webpage)
- A set of colouring pencils and an HB pencil (for sketching your design)
- A set of thin, coloured markers
- Scissors
- Clear tape and/or a stapler and/or stick glue OR
- A hot-glue gun & glue sticks
- A ruler (optional)
STEP 2: DRAW OUT THE IMAGE YOU WILL USE TO CREATE YOUR ANIMAL OR ROBOT MASK ON A SHEET OF PAPER
Use the guidelines in the image below to help you draw out the creature that will be used to make your mask, or trace the outline of the mask on your paper to plan out your drawing. You can create something completely natural, animals you are familiar with, or you can take inspiration from elements of pop culture, like emojis or cartoon characters from books or television.
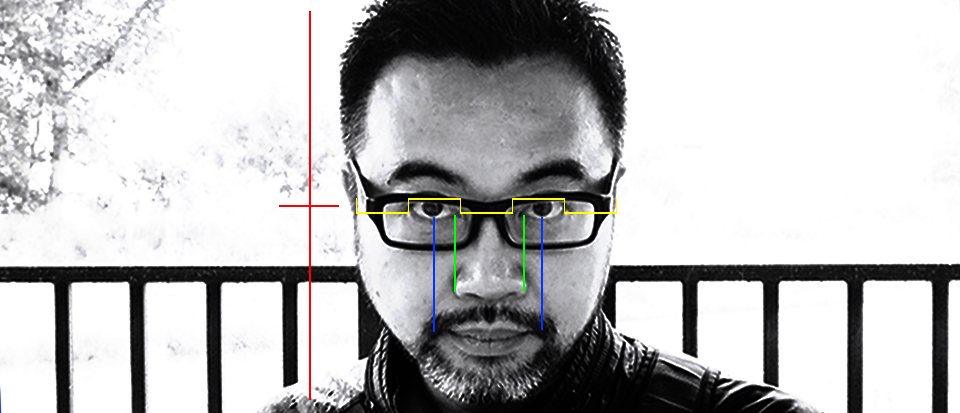
Start by drawing the outline of the parts of the face using an HB pencil on a sheet of paper 8.5 X 11 inches in size, then add colours using markers. You can then fill in the line work using coloured pencils, or you can just colour parts of the features, as the main work will be done on the mask itself. Hang on to these sketch drawings as they be used to make a zine publication.
STEP 3: COLOUR THE BACKGROUND OF YOUR PAPER MASK WITH MARKERS AND COLOURING PENCILS, OR GLUE COLOURED CELLOPHANE TO YOUR MASK SURFACE
This last mask-making technique can be used with both a plastic face-mask or one this is made of paper. Plastic masks tend to be very difficult to cut, and for that reason, it is much easier to create a personalized mask by adding materials to the surface rather than trying to cut sections out or by colouring the surface itself with markers or colouring pencils.
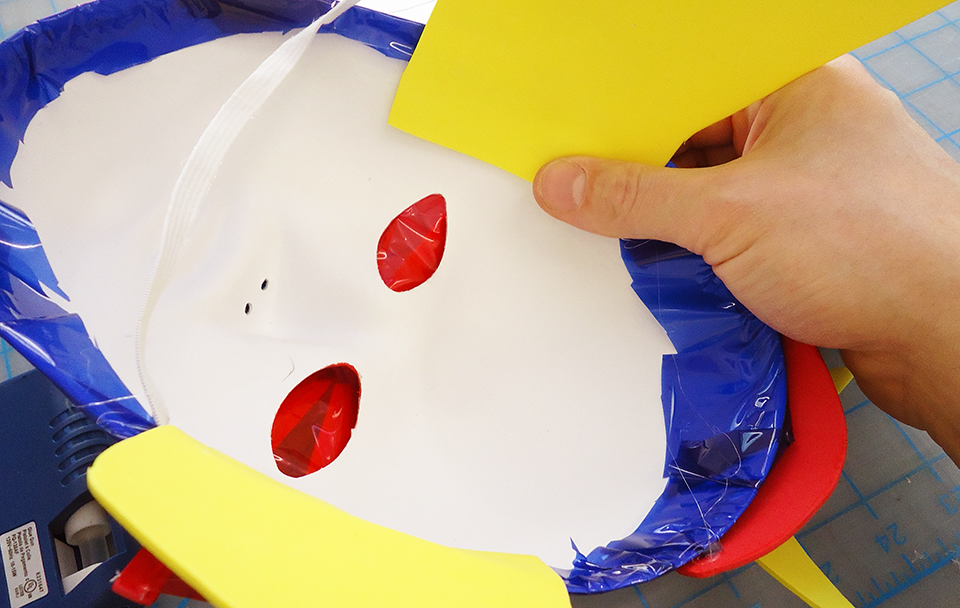
Always start by treating the surfaces around the eyes and nose as you want to make sure that you leave the eye and nostril holes free to see and breathe safely.
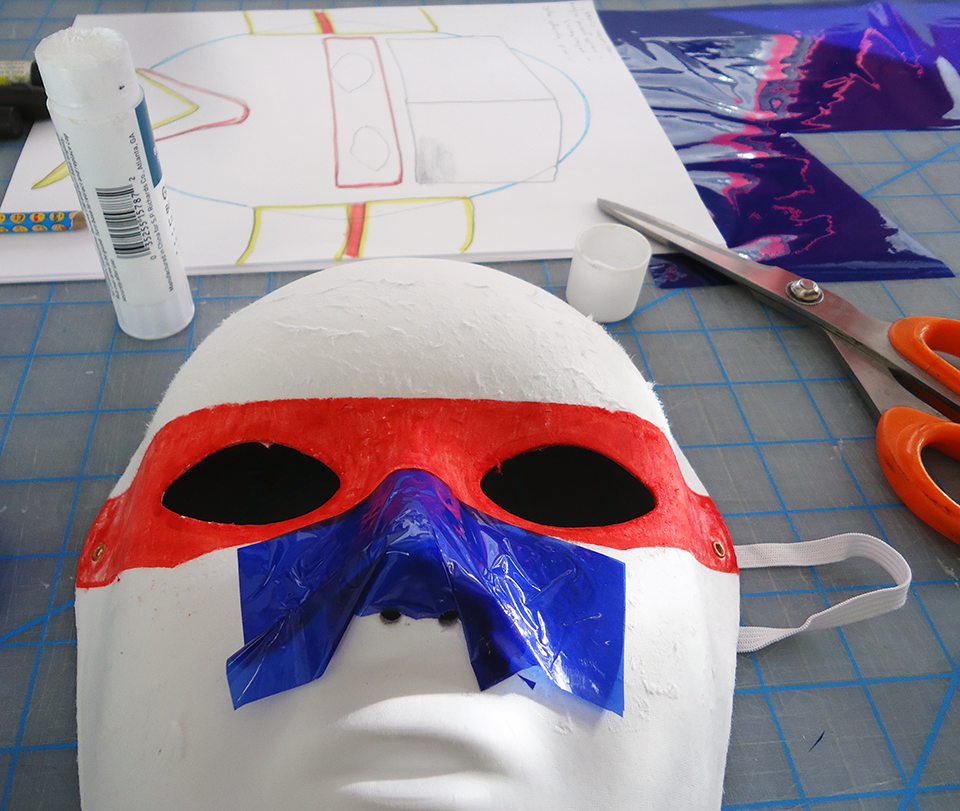
Use stick glue on the large, main surfaces of the mask and seal the cellophane to the back of the mask so that the strips of colour stay firmly in place even when wearing it. Don’t forget to seal any cracks in the front surface with hot glue once you’ve finished.
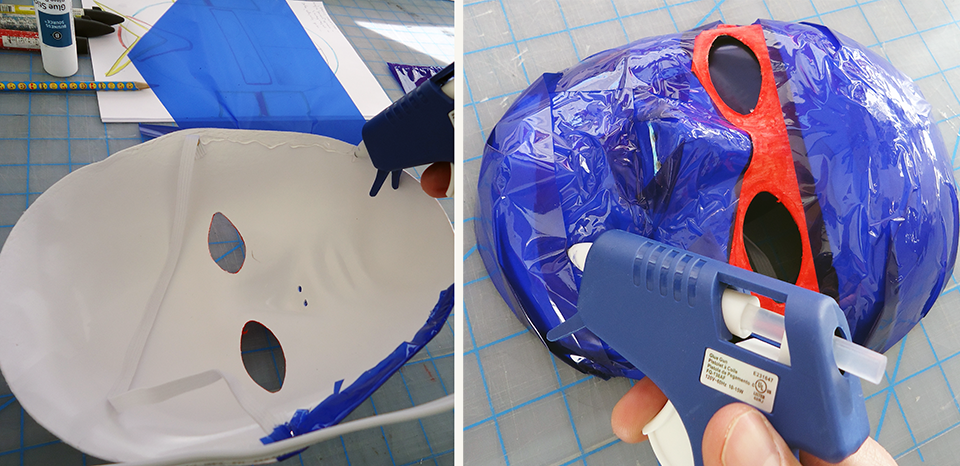
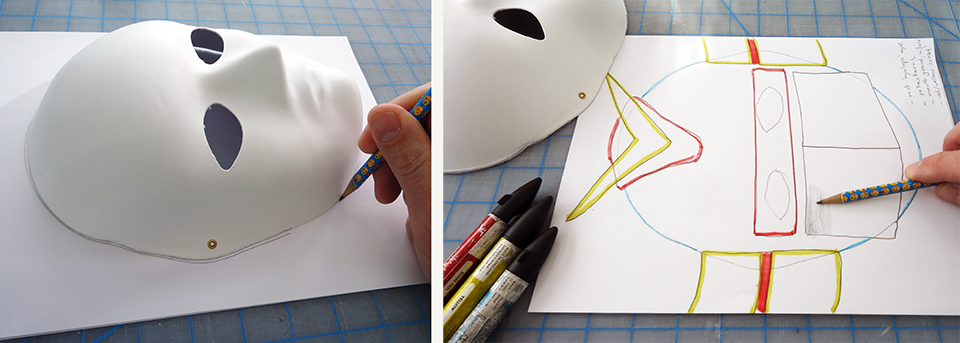
Next, use the mask as a model or template to draw out the edges of the different parts, or use the paper sheet to make stencils of the different details, using them to cut out the construction paper or foam sheets to size. Remember, if you drew the contour of the mask on the white paper in STEP 2, then all details should be the right size.
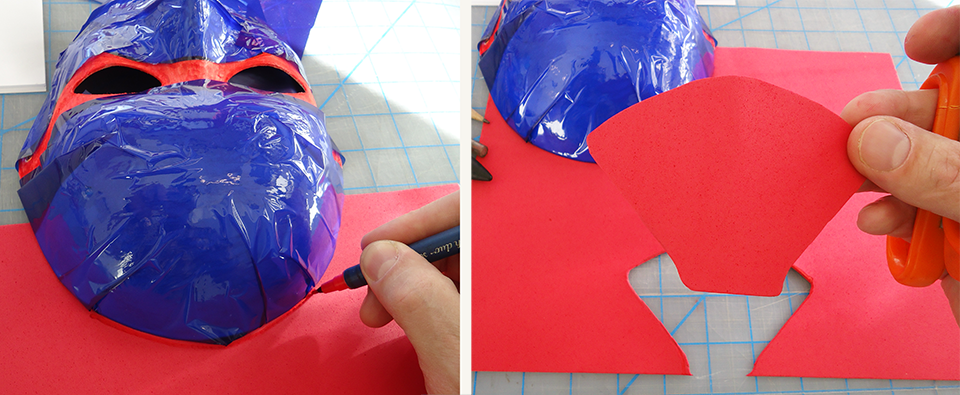
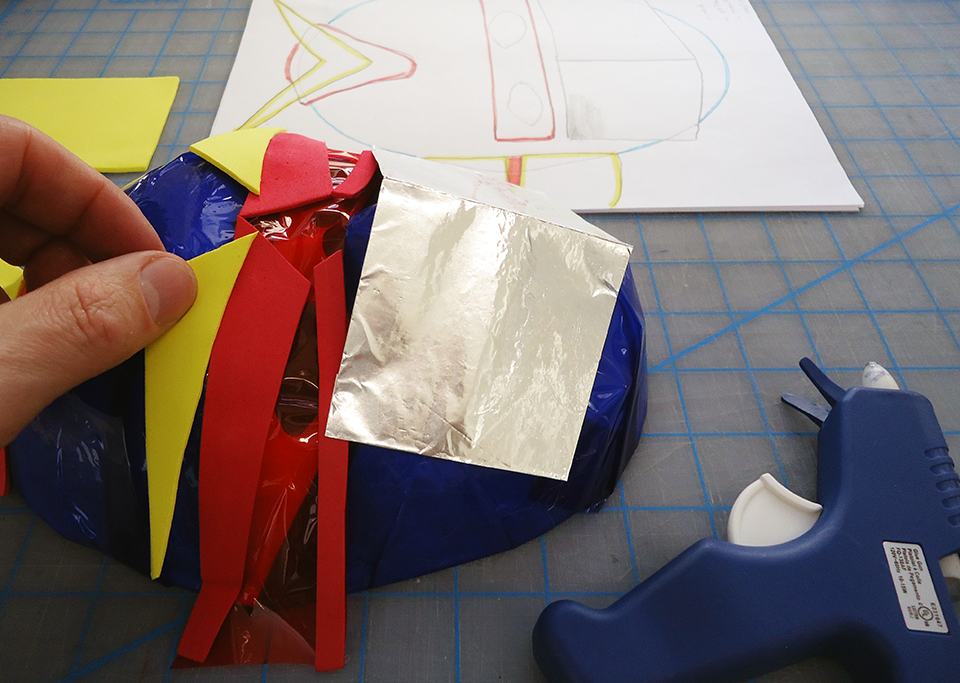
Build all the different parts of the extra details of your mask separately before glueing them in place. This will give you a chance to change your mind if you want to, or to add extra details you hadn’t thought of before. You also want to be sure everything is the right size and situated in the right place before gluing them down.
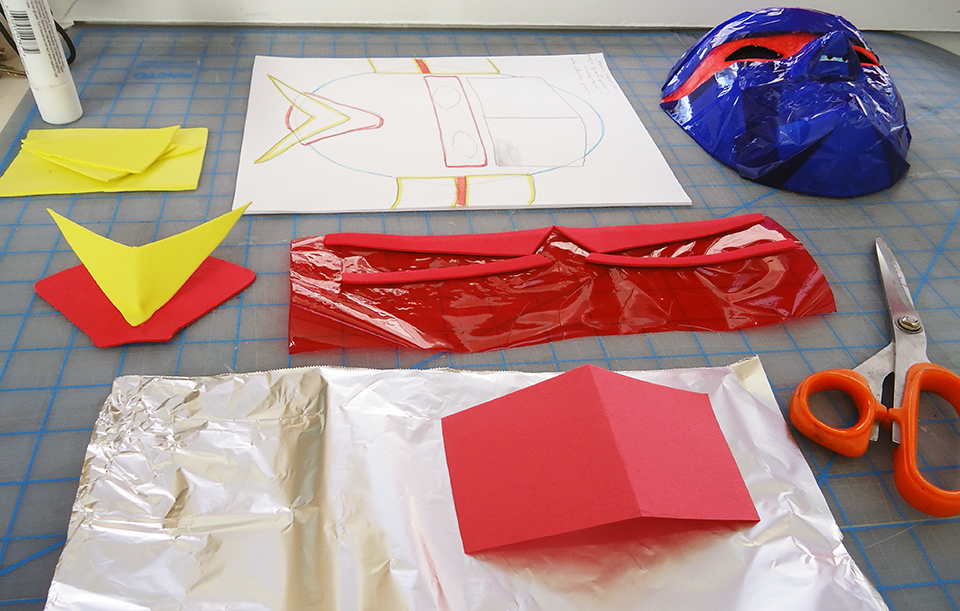
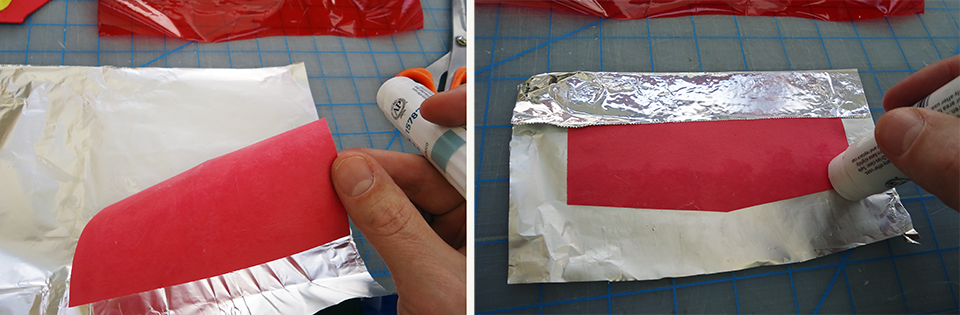
Tinfoil is great for covering the background of your mask instead of the coloured cellophane, though it is too thin and fragile to use on its own to make rigid parts or details. When making details, use stick glue to cover the surface of construction paper that has been cut to the right size. Make sure to coat both the surface of the paper and the surface of the tinfoil when glueing them together. This will make for a much stronger bond.
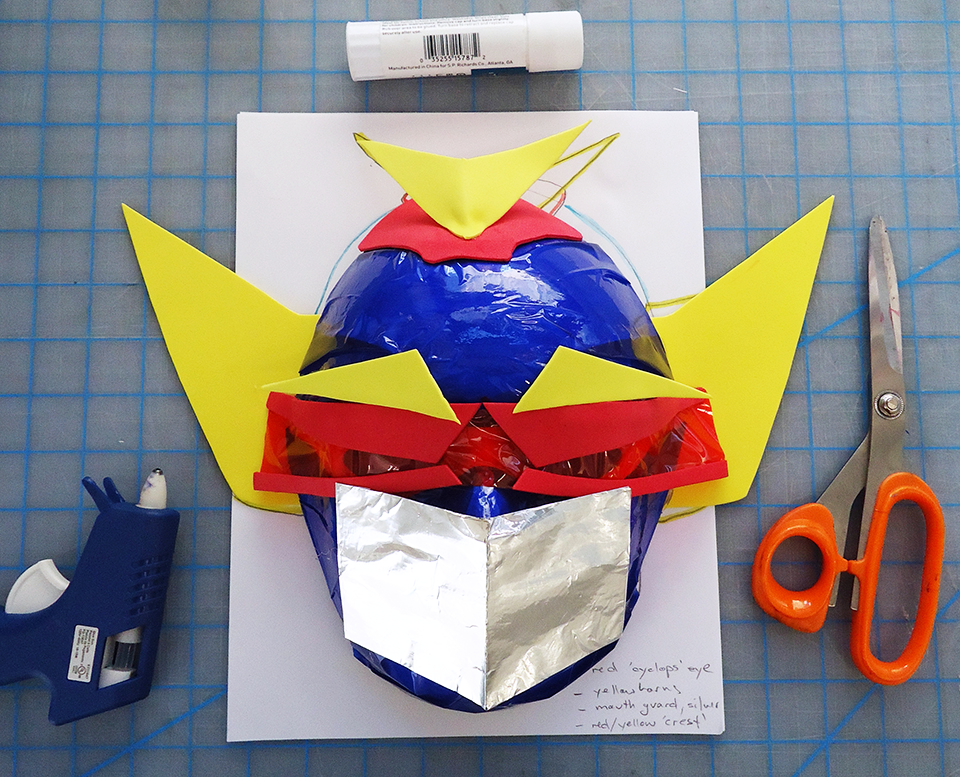
STEP 4: ASSEMBLE AND BIND ALL THE PARTS TO YOUR MASK USING STICK GLUE OR HOT GLUE
Be careful not to hurt yourself when using the hot glue, or ask for the help of an adult to get this work done. If you’re only using stick glue, remember to coat both surfaces and make sure to press the pieces firmly together for at least ten seconds.
Don’t be afraid to add extra details if you feel something is missing. For example, yellow eyebrows were added to give this character more colour and expression even though they don’t figure in the planned sketch.
STEP 5: USE ALL YOUR DRAWINGS OF FACES AND MASKS TO CREATE A FINAL ZINE PUBLICATION
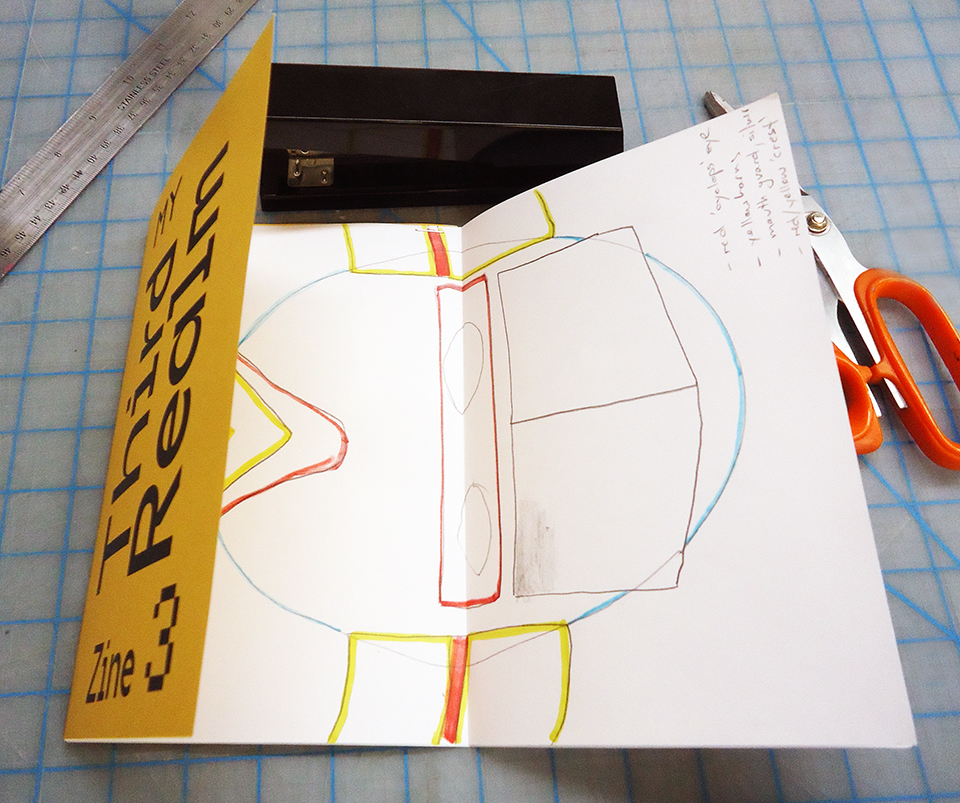
Once you’ve finished making your different masks, bind the pages involved using a pre-printed 8.5 X 11 inch cover page that has been folded down the middle.
Staple half-page drawings at the top of the image, so that the paper is bound to the back cover at the top of the page, to the left and right. This will allow your drawings to be seen as a note pad once the cover is open, by flipping the pages up from the bottom, rather than from left to right.
When including full pages, these can be folded into the publication as a ‘centre-fold’, and stapled at the top of the back cover as shown below.
STEP 6: SHARE YOUR WORK
If you share your work online, be sure to tag @polygongallery as we would love to see your robot and/or animal face masks.
Join us on Saturday, November 7th, in order to experiment with these mask-making techniques, while learning how to produce your own zine publication. Hope to see you soon!