Kids First Saturdays: Making Faces Iii
This week, we continue learning how to make different masks by drawing with coloured media. This is the third of three activities, along with making your own zine publication, taking place during our in-gallery Kids First programming on Saturday, November 7th 2020.
Advance registration for Kids First programming can be done by emailing kidsfirstsaturdays@thepolygon.ca and same-day registration should be done by telephoning the admissions desk at 604-986-1351. Our new Covid-19 plan ensures a safe experience for all.
For anyone visiting the gallery from September 4th to November 8th 2020, download and print this ‘Seek and Find’ document before your visit, to help you look closer at the artworks in the exhibition. Or, use your personal device to look at the sheet as you go through the exhibit with your family.
INSPIRATION
Over the past few months, we have discovered the artistic practice of 8 artists from the Third Realm exhibition. This week, the work of Apichatpong Weerasethakul will be our main source of inspiration, as his photographs look at the history of his native Thailand through the lens of the supernatural.

Ghost Mask (2009) by Apichatpong Weerasethakul, courtesy of FarEastFarWest Collection.
For example, the above image is part of a larger series called Primitive (2009). With this image of a young boy wearing of a mask, the artist questions the official recorded history of the town of Nabua using the language of surrealism.
In a similar way, we will be learning how to make imaginary face masks, as a way of exploring how the human face figures in contemporary art.
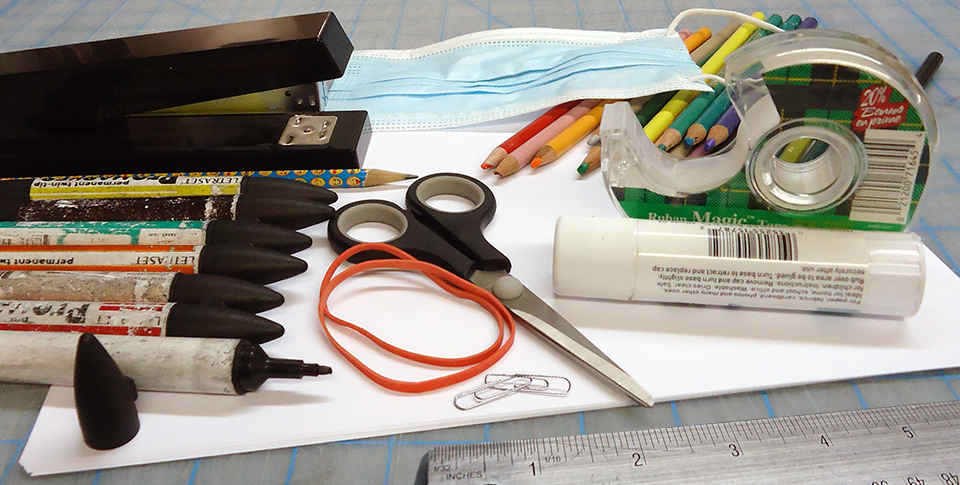
STEP 1: GATHER MATERIALS
- White drawing paper, full 8.5 X 11 inch sheets
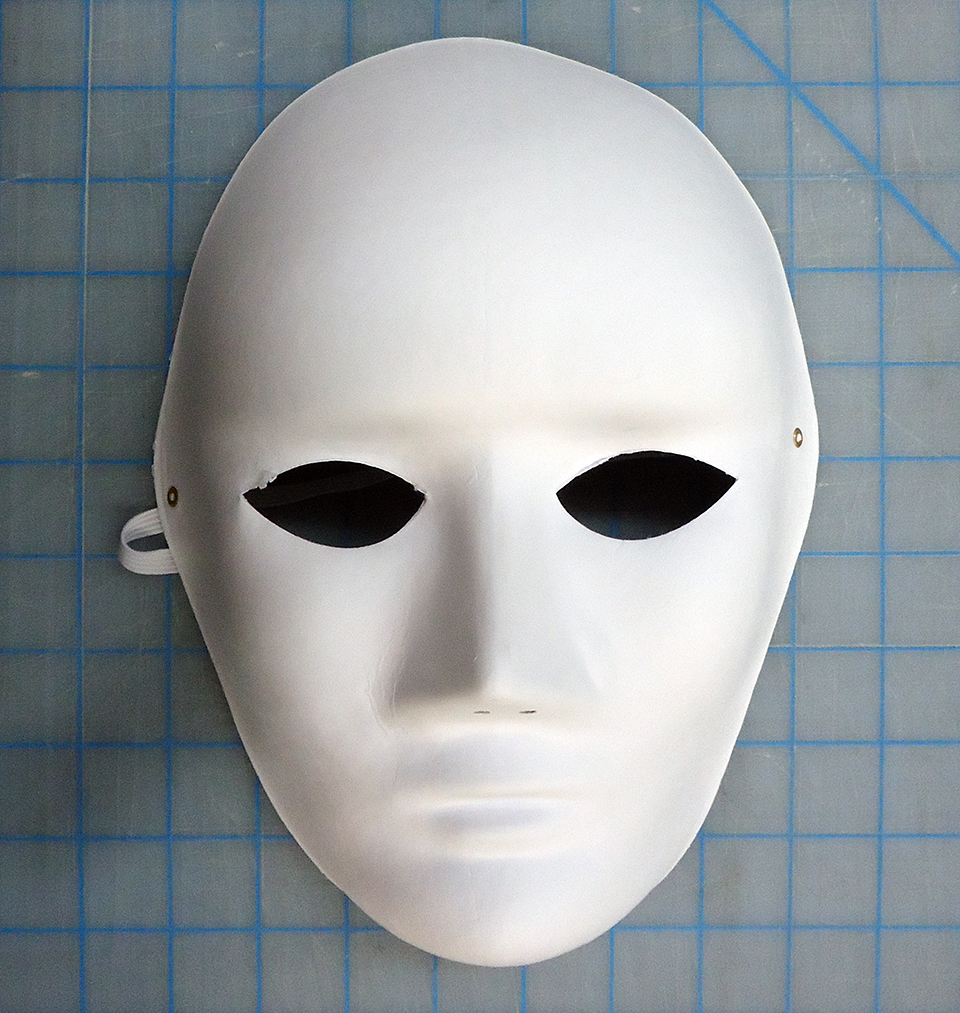
- A neutral theatre mask, made from paper (available in most craft/art-supply stores)
- A regular, HB pencil and eraser
- A set of colouring pencils (w/pencil sharpener)
- A set of thin, coloured markers
- Scissors
- Optional: clear tape and/or stick glue
STEP 2: DRAW OUT THE IMAGE YOU WILL USE TO CREATE YOUR SUPERNATURAL MASK ON A SHEET OF PAPER
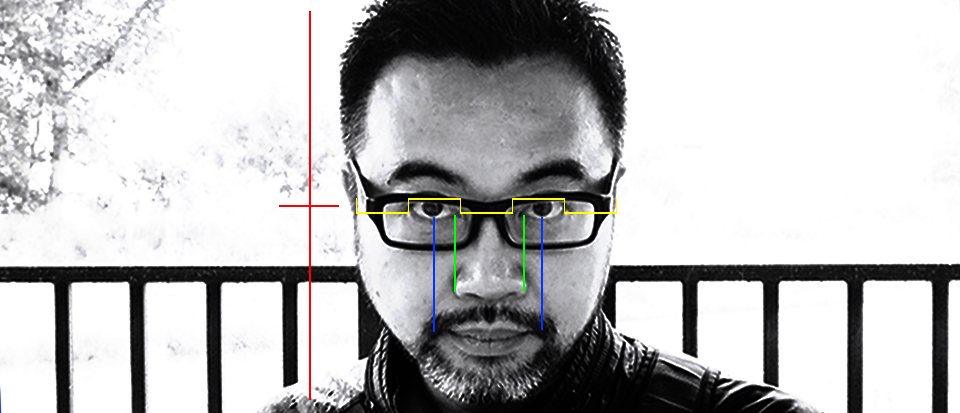
Use the guidelines in the image below to help you draw out the supernatural image that will be used to make your mask. You can create something funny or spooky, or you can take inspiration from elements of pop culture, like emojis or cartoon characters from books or television. Start by drawing the outline of the parts of the face using an HB pencil.
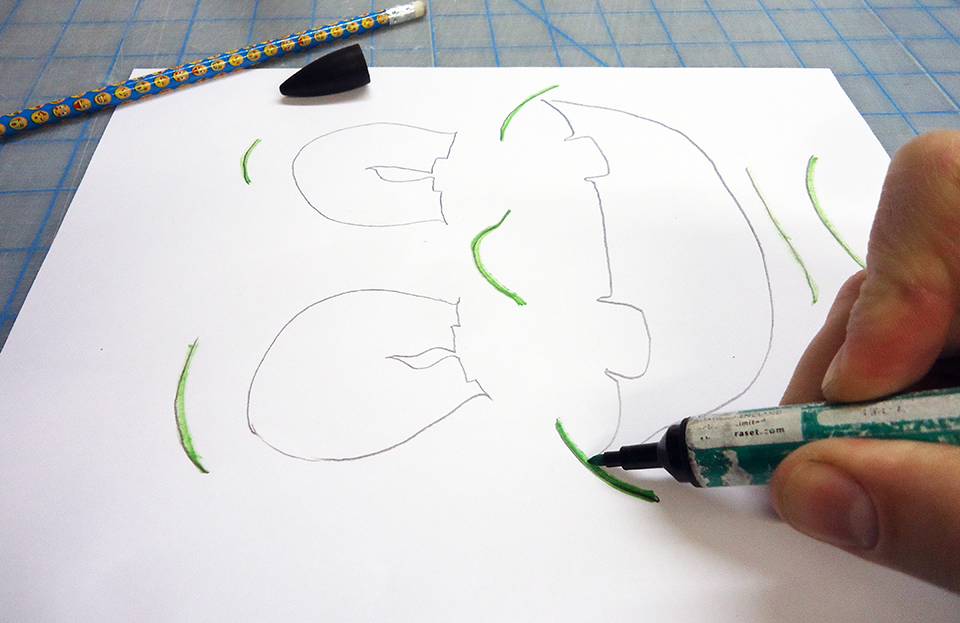
When finished with the outlines, use the coloured markers to trace over these lines in the appropriate colours of your choice, then fill in the line work using coloured pencils. You can also just colour parts of the features, as the main work will be done on your mask itself, or you can complete your drawing to be used to make a zine publication.
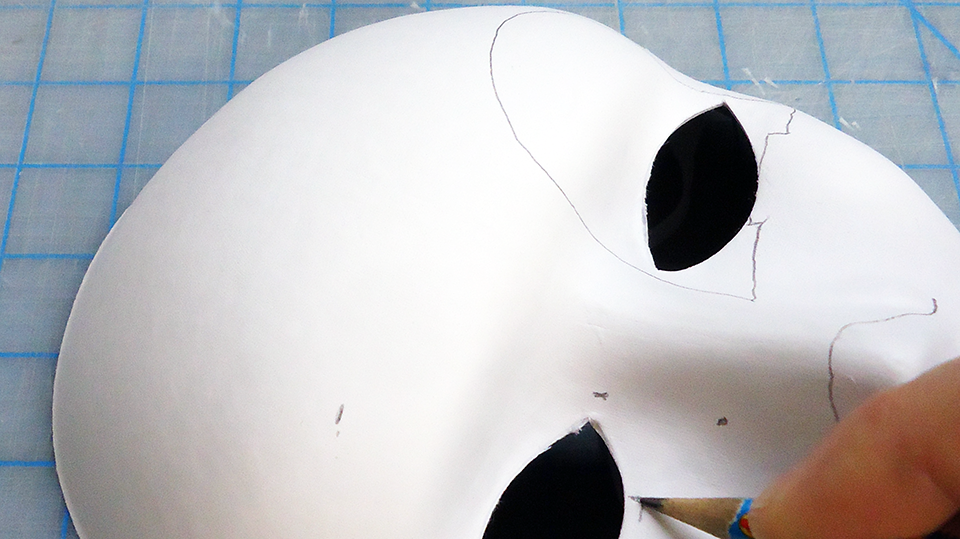
STEP 3: TRANSFER THE IMAGE OF YOUR CHARACTER ONTO THE PAPER MASK BEFORE CUTTING OUT THE DETAILS
Use an HB pencil again to transfer your character image onto the paper mask. Use small marks to each side of the eye holes to make sure your facial features are symmetrical: that they are the same shape and size on both sides of the mask.
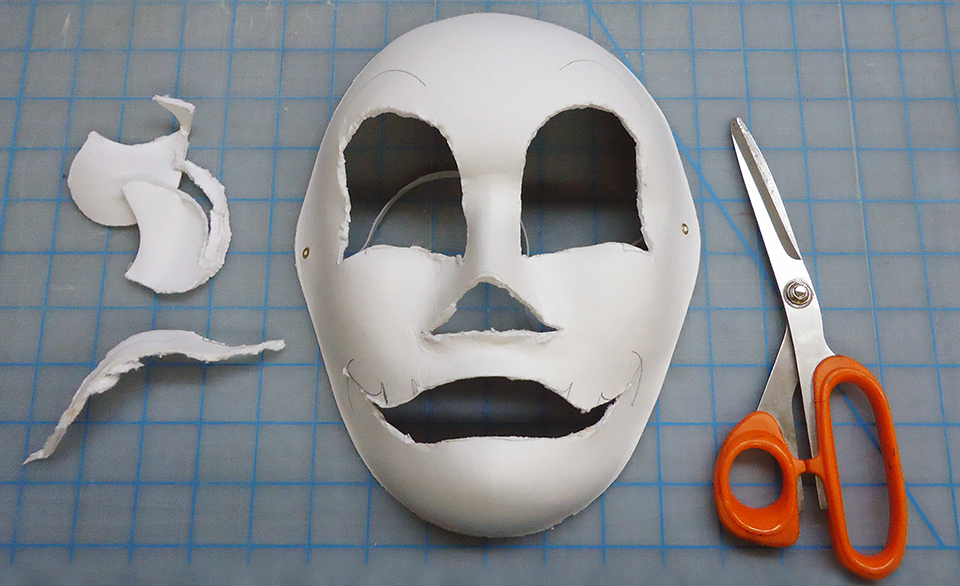
Once the outline is complete, use scissors to cut out the individual parts of your mask. If necessary, get help from an adult to complete this step as different commercial masks will be either easier or harder to cut.
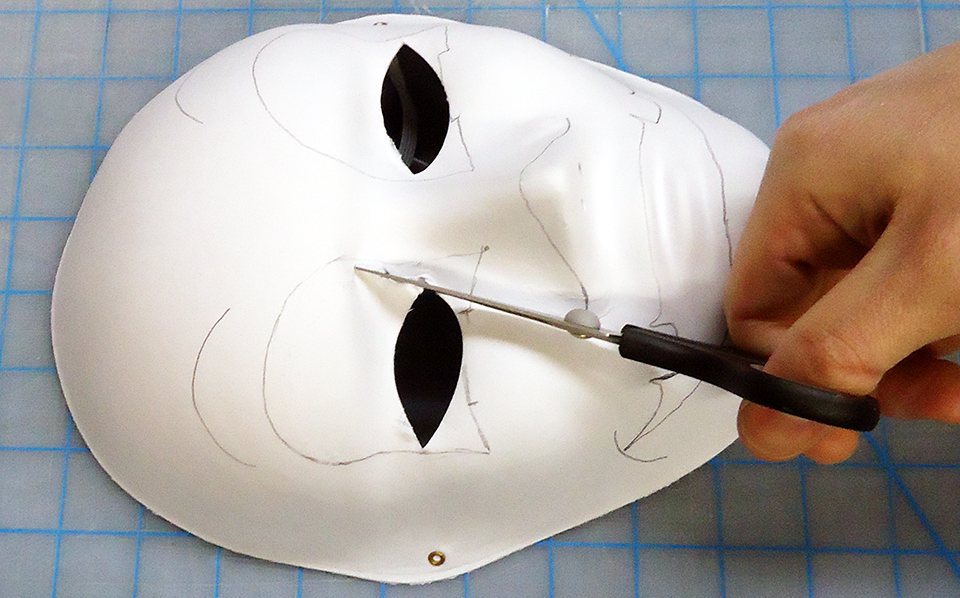
If some details are too difficult to cut out, like nostrils or teeth, either cut them out with more space (nostrils in this example), or leave them in to be completed with the colour details (as with the teeth here).
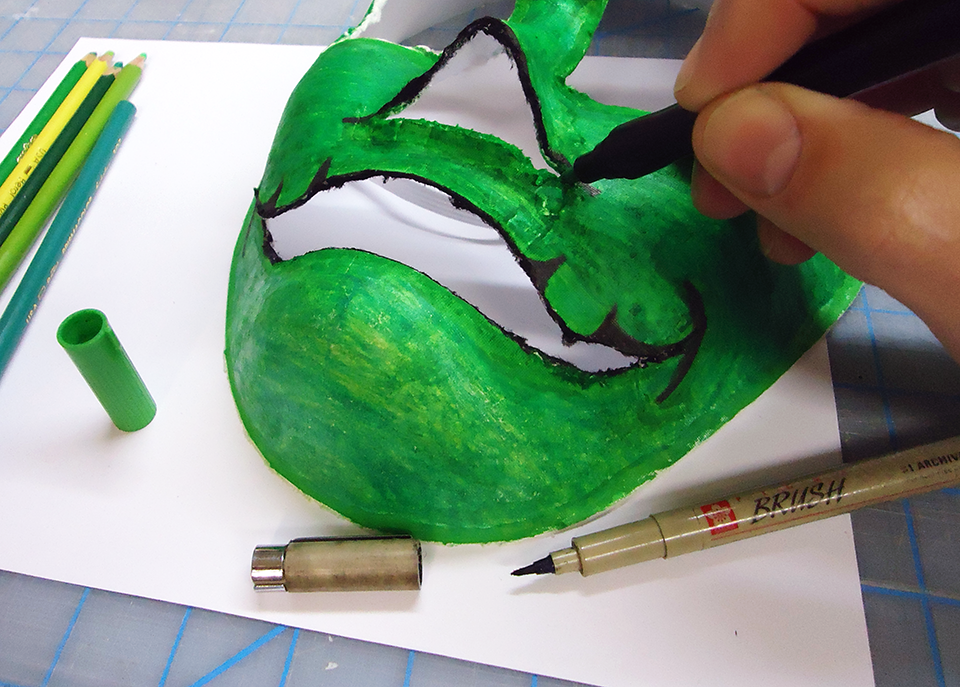
STEP 4: USE COLOURED MARKERS AND PENCIL CRAYONS TO ADD COLOUR AND DETAILS TO YOUR MASK
Trace over the HB pencil lines using coloured markers. You can then use an eraser to remove the pencil lines.
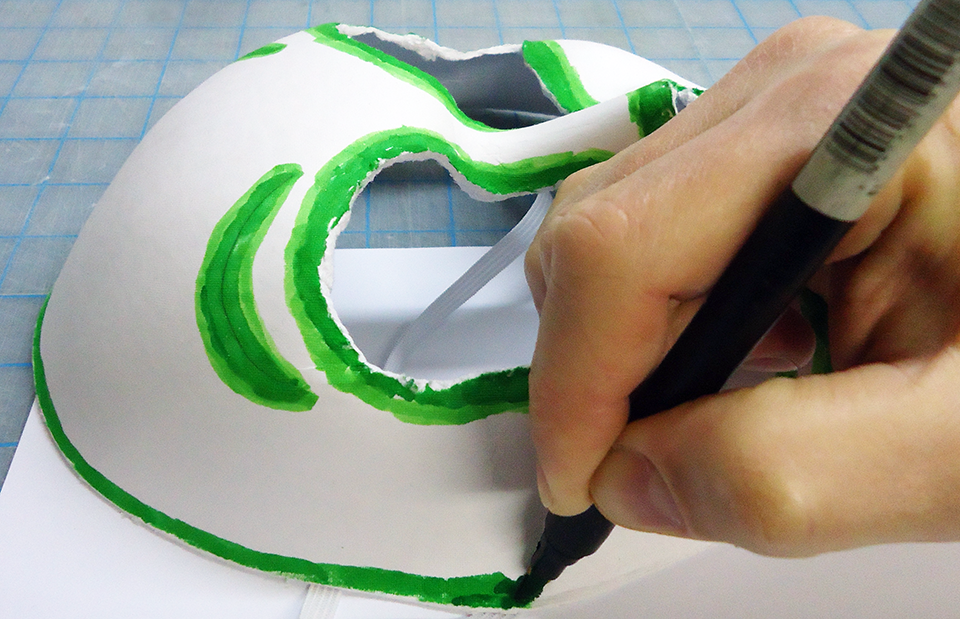
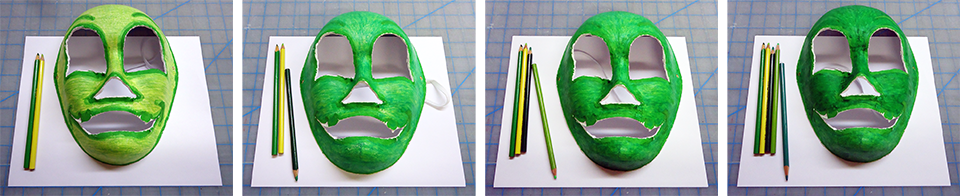
Use pencil crayons to add colour to the background of the image. Add as many layers as you need until you feel the colour is to your liking. Leave the black outlines for last!
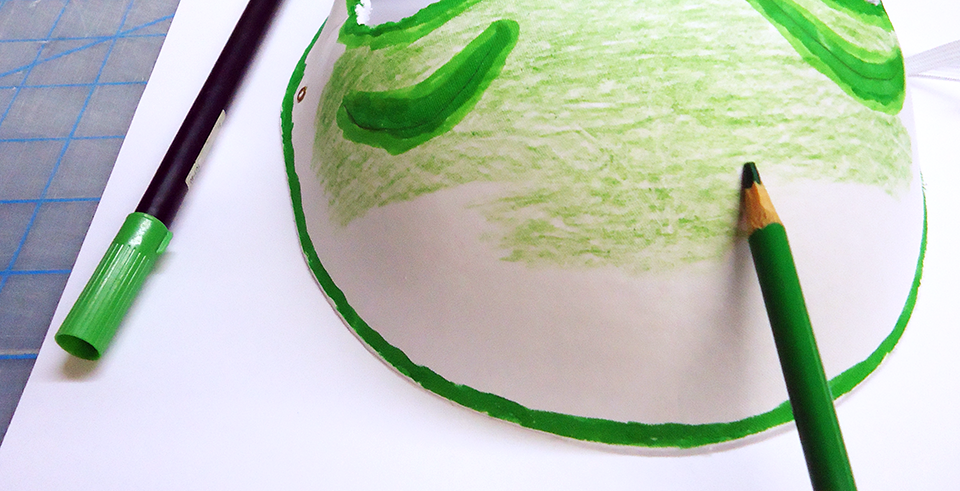
STEP 5: ADD THE LAST DETAILS TO YOUR MASK
Add the final details with coloured markers or with permanent black. All the torn/cut edges can be drawn on to match the background colour or to accentuate the facial features.
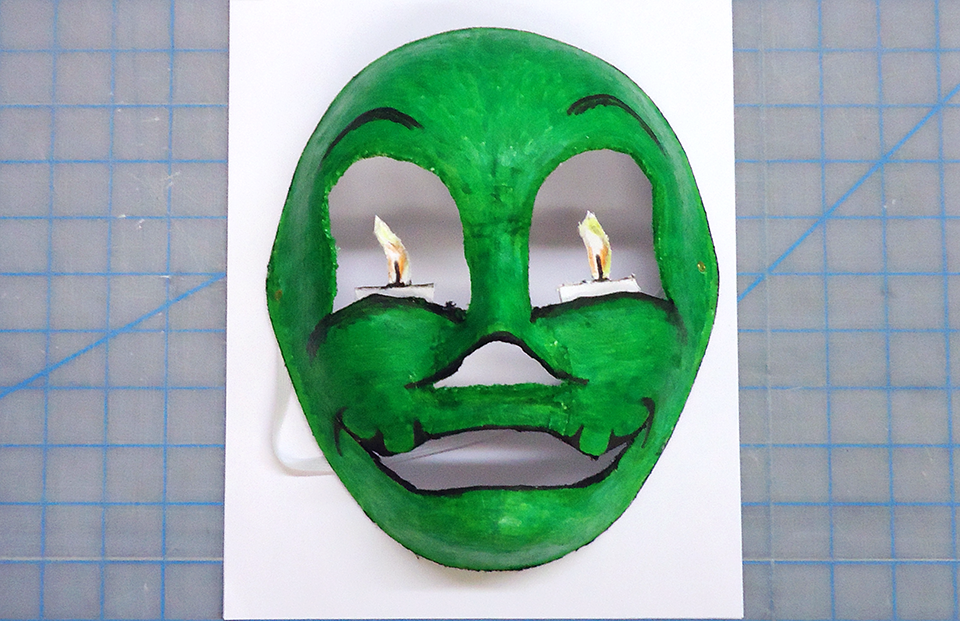
If extra details need to be added, feel free to use tape or stick glue to add ears, hair or something surprising to complete the look you’re trying to make.
STEP 6: SHARE YOUR WORK
If you share your work online, be sure to tag @polygongallery as we would love to see your creepy and/or funny face masks.
Join us on Saturday, November 7th, in order to experiment with even more mask-making techniques, while learning how to produce your own zine publication. Hope to see you soon!