Kids First Saturdays: Making Faces Ii
Let’s continue making different paper faces by drawing with coloured media. This is the second of three activities that will be used to create your own mask and zine publication during our in-gallery Kids First programming on Saturday, November 7th 2020.
Advance registration for Kids First programming can be done by emailing s.bernard@thepolygon.ca and same-day registration should be done by telephoning the admissions desk at 604-986-1351. Our new Covid-19 plan ensures a safe experience for all.
For anyone visiting the gallery from September 4th to November 8th 2020, download and print this ‘Seek and Find’ document before your visit, to help you look closer at the artworks in the exhibition. Or, use your personal device to look at the sheet as you go through the exhibit with your family.
INSPIRATION
For the next several months, we will discover the artistic practice of 8 artists from the Third Realm exhibition. This week, we continue looking at the series of photographs titled Extras (2010), by Chinese artist Yang Zhenzhong, where facial features hover between fiction and reality.

On the one hand, the highly detailed photographs show us happy, smiling faces that welcome us with their obvious display of emotion. Yet, when seen in person, these larger-than-life images give us a close look at the flaws most people try to hide: wrinkles, facial hair, freckles and birth marks that can sometimes make people feel self conscious.
But more than this visual sense of scale, the people in the images themselves are not quite what they seem. The men and women in the photographs were actually photographed alone in a studio as the artist instructed these actors to imagine a moment of joy from their lives. That means these are not candid snapshots of happy people, but in fact artificially constructed images.

In a similar way, we will be learning how to draw realistic faces, to eventually make different kinds of masks, as a way of exploring how the human face figures in contemporary art. Last week, we demonstrated how to turn a sheet of computer paper into a personalized, disposable face mask, and this week we explain how to make a full-sized face mask using similar materials.
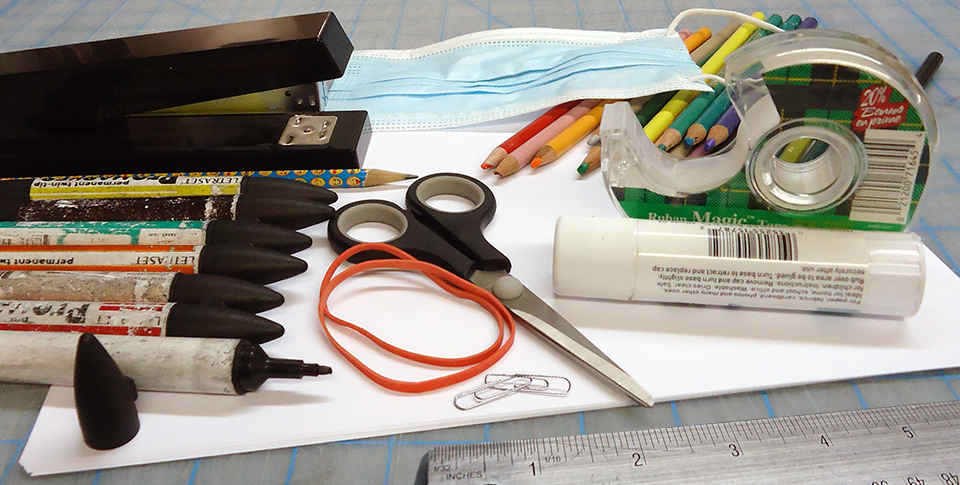
STEP 1: GATHER MATERIALS
- White drawing paper or Bristol board, cut to 8.5 X 11 inch sheets
- A regular, HB pencil and eraser
- A set of colouring pencils (w/pencil sharpener)
- A set of thin, coloured markers
- Rubber bands or hair elastics
- A ruler
- Scissors
- Stick glue
- A stapler
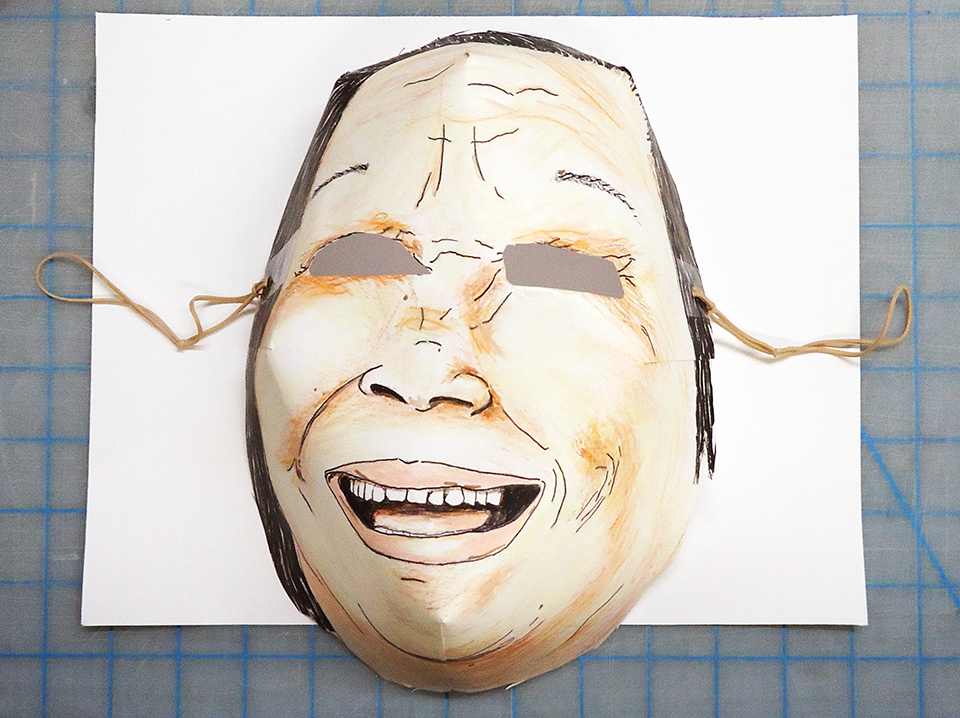
STEP 2: DRAW A HUMAN FACE ON THE FRONT SIDE OF THE MASK TEMPLATE
Using the instructions that were outlined last week, take the time to draw a smiling face on the main side of the mask template. This template has been created so that most faces will fit the space, when drawn in a realistic manner. (Click on the image below to download the PDF.)

By lining up the eyes of the person with the reverse side of the template, where the ovals are placed as the eyes should appear, this will allow you to draw both a child’s face, or that of an adult, using the same sheet.
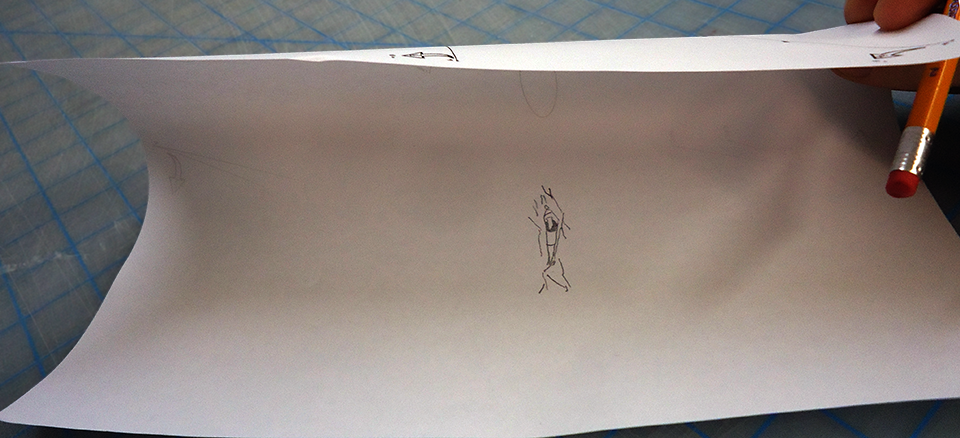
STEP 3: ONCE YOU’VE FINISHED DRAWING THE IMAGE OF A FACE, FLIP THE TEMPLATE OVER AND CUT ALONG THE STRAIGHT LINES, DEPENDING ON THE AGE OF THE PERSON: ADULT SIZE OR CHILD

The length of the cuts is smaller for an adult face as it takes more room on the paper or Bristol board, whereas the image of a child’s face uses much less space and therefore the cuts are longer to make up for this fact. Once done, the edges of the drawing will have 6 different cuts: 3 at the top, one to each side and one at the bottom.

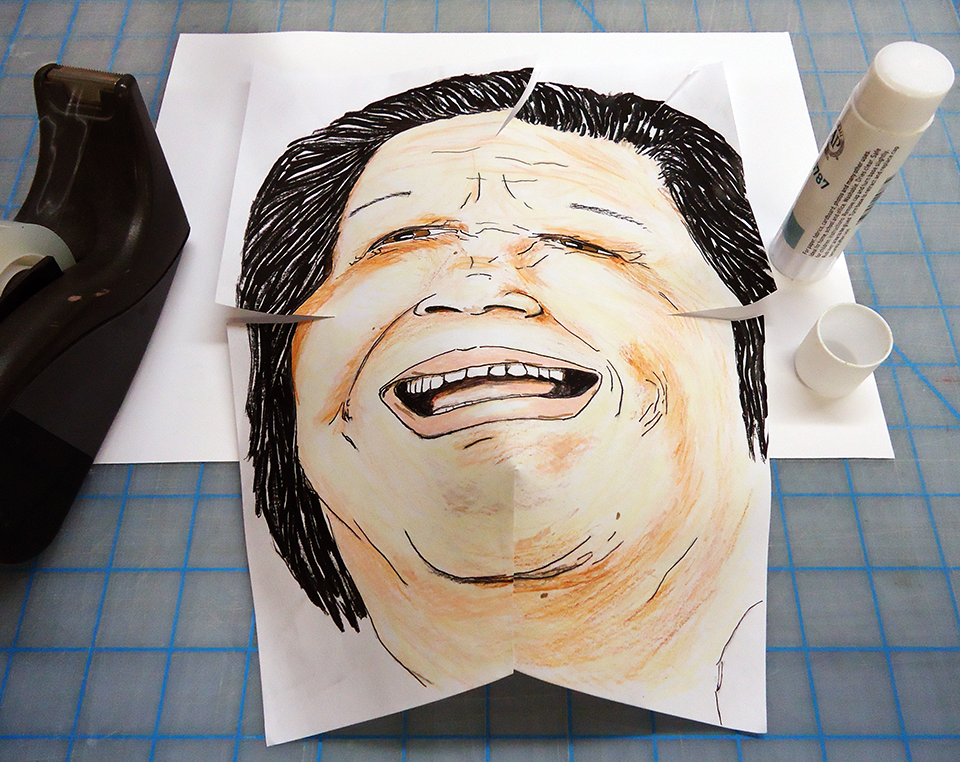
STEP 4: USE STICK GLUE AND CLEAR TAPE TO CURVE YOUR DRAWING INTO THE SHAPE OF A MASK
The next step involves folding the paper over so that each cut overlaps the edge of the paper that was separated. Bring the paper together so that the ‘A’ tab matches up with the ‘B’ tab for each cut, then glue and fold them together from the back so that you can’t see these materials from the front side of your mask.

As you glue and tape each cut, the mask will begin to curve in the third dimension.
STEP 5: TRIM THE EDGES, ADD A HEADBAND OR ELASTICS, AND REMOVE THE EYE HOLES TO COMPLETE YOUR MASK

To add fasteners to the side of your mask at the same height as the eyes, begin by covering the edge of your mask with clear tape on the inside, to make the paper stronger, then punch a hole through the tape and paper with scissors. Ask for help from an adult as this can be tricky.
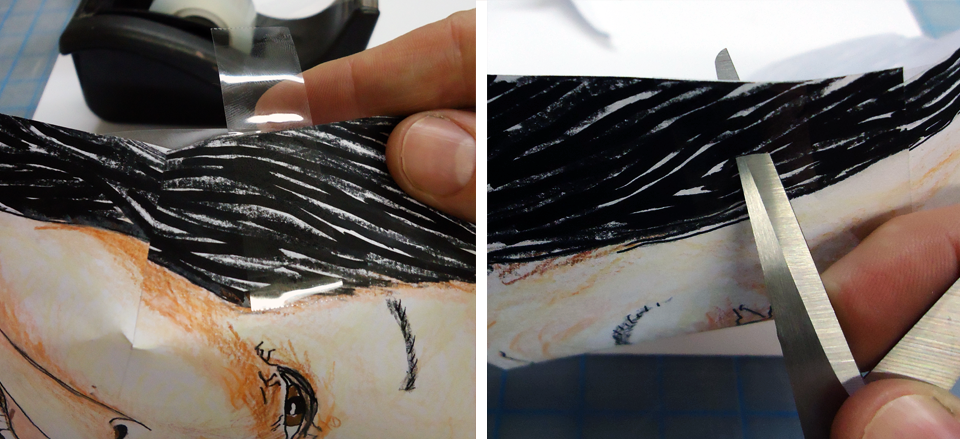
Then loop a few elastic bands through the holes to connect them to the mask. One rubber band for children, and two on each side for adults.

Cover the inside of your mask with more clear tape before cutting out the eye holes, to make the mask stronger.

You can even cut out only part of the eyes and fold the eye holes back to keep your drawing in one piece, that way, you can put them back in place when you’re not wearing it.
STEP 6: SHARE YOUR WORK
If you share your work online, be sure to tag @polygongallery as we would love to see your personalized face masks.
Join us on Saturday, November 7th, in order to experiment with more mask making tricks while learning how to produce your own zine publication. Hope to see you soon!