Kids First Saturdays: Monoprints
This month, we continue exploring new ways to print, this time using black fabric ink and textiles.
For anyone visiting the gallery from December 4th 2020 to January 10th 2021, download and print this ‘Seek and Find’ document before your visit, to help you look closer at the artworks in the exhibition. Or, use your personal device to look at the sheet as you go through the exhibit with your family.
INSPIRATION
The printmaking techniques we will be using this month are inspired in part by the work of Gregory Kaplowitz, who is one of the two artists from the Mesh exhibition.
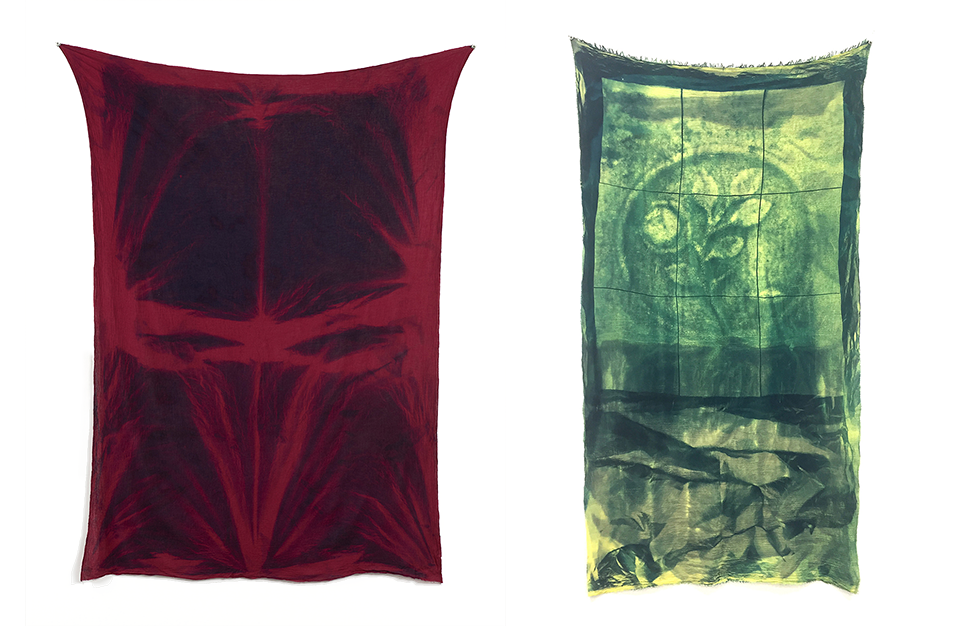
Gregory Kaplowitz is an artist living in San Francisco, who has recently won the first annual MESH prize, in collaboration with artist Izabella Provan. His intimate works are mostly abstract, though they also create a sense of personal spaces through his use of tactile and analog photographic methods.
In a similar way, we will be exploring how to print on, and/or with different textiles, as a new way of producing luscious, physical impressions using everyday materials.
The term ‘monoprints’ is used to describe single images that vary from one print to the next, which are made with printmaking techniques. Printmaking is usually a way to create several examples of the exact same image, which are artworks that are made as a multiple, but in some cases where the images are different from one print to the next, we say that each example is a unique ‘monoprint’ as there are no two exactly alike.
For instance, the instructions below explain how to make a print on paper from fabrics that have been covered in ink. If you were to try making two separate images using the same process and materials, while placed in the same order, they would look slightly different with every image as the fabrics would move a bit from one print to the next, and the textiles themselves would also show a slightly different texture from one image to the next, as the inking process is inconsistent.
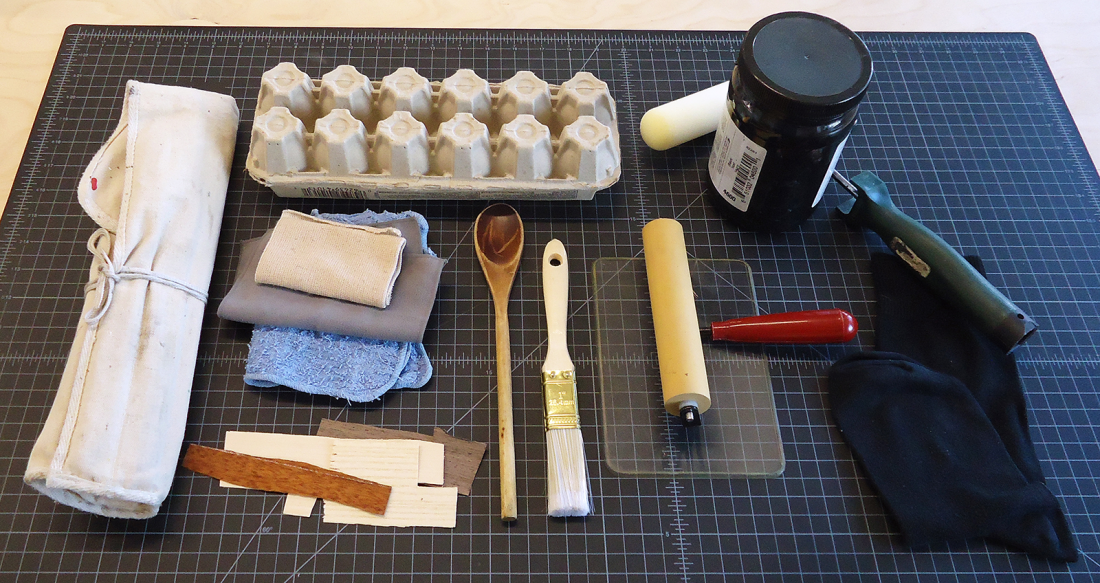
STEP 1: GATHER MATERIALS
- Black, acrylic water-based printing ink
- An ink slab: glass or plexiglass surface to prepare the ink (alternative: 8.5 X 11 inch acetate sheet from the office supply store)
- A brayer, or ink roller (from the art/craft store), or a paint brush or roller (if brayers are hard to find)
- 8.5 X 11 inch drawing paper or coloured construction paper
- Different kinds of cut fabric (face cloth, handkerchief, stretch bandage, sock, etc.)
- Optional: other textured wood, paper or cardboard (egg carton, thin wood strips, mesh vegetable wrapping, etc.)
- Newspaper or other recycling paper or cardboard (to keep your work area clean)
- A large wooden spoon (to burnish, or firmly rub, the printing paper to better lift the image from the inked surface)
- Burnishing alternative: tablespoon
- Optional: spray/mist bottle containing water
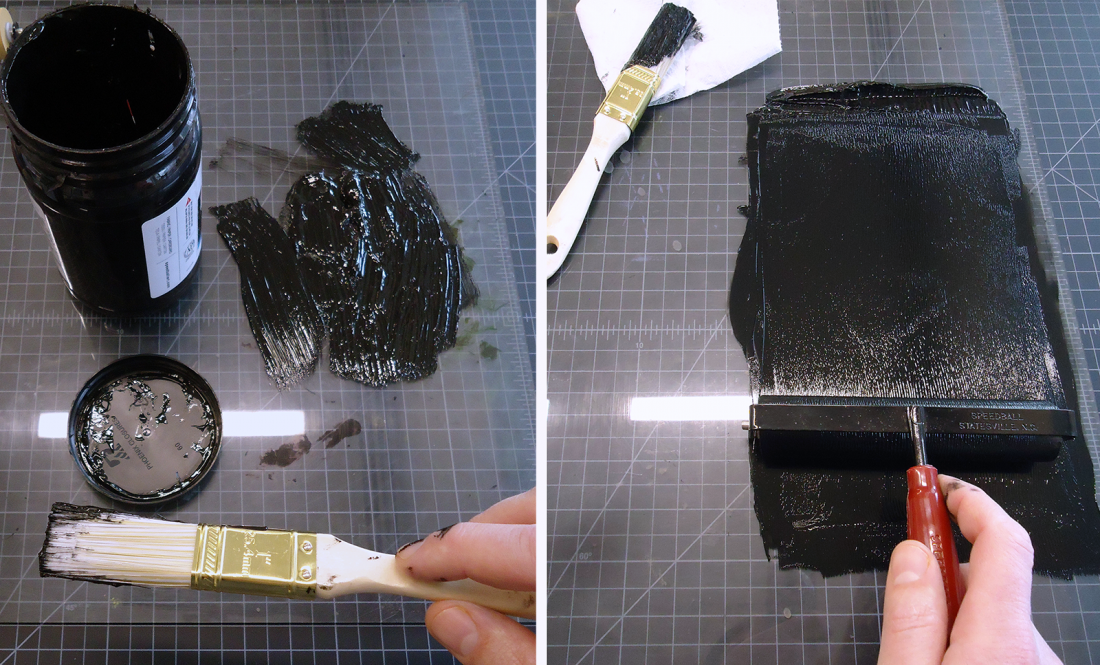
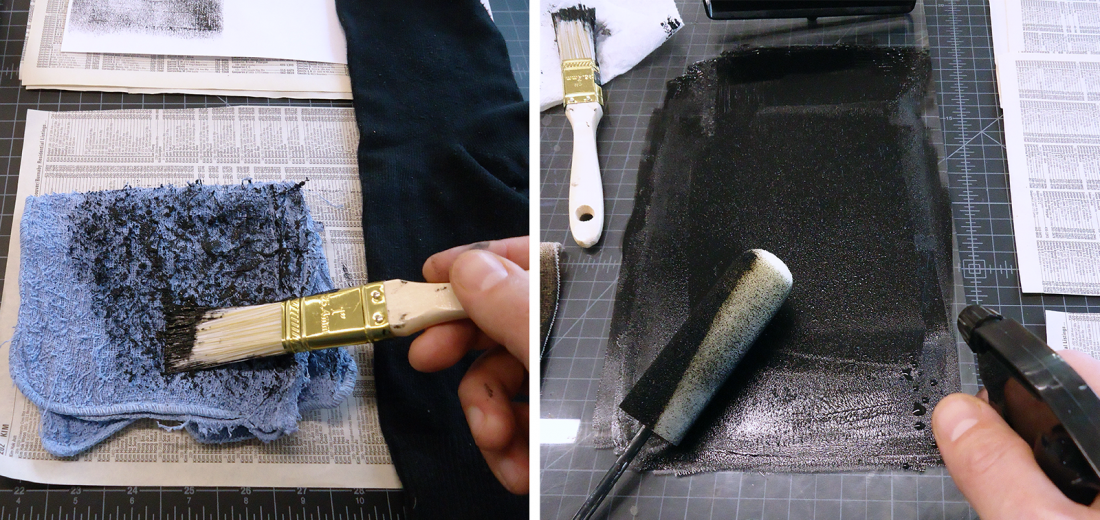
STEP 2: PREPARE THE INK BY LOADING THE BRAYER ON A CLEAN, FLAT SURFACE
Use a thin paint brush or spatula to remove fabric ink from the container and apply it to the ink slab. Use the brayer to gradually spread the ink to make a thin, even coat that is a bit sticky when you roll it. Push the excess ink to the top or bottom of this area, so that it is ready to use after you’ve coated the first layer onto your fabric.
STEP 3: ROLL SEVERAL LAYERS OF INK ONTO ONE FABRIC SURFACE
With a loaded brayer, add the first layer of ink to your fabric by rolling it on evenly back and forth in one direction, either up or down, or from left to right. The first layer won’t completely coat your fabric as it is very absorbent. Take the brayer, and load on a second coat of ink by repeating STEP 2.
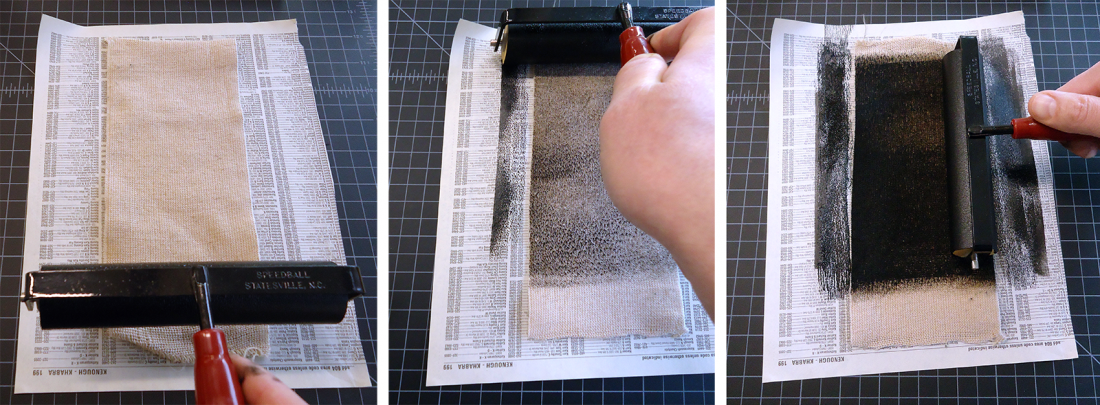
Roll a second coat of ink onto your fabric by moving it in the opposite direction than the first layer. Repeat this process until the fabric is well coated. This will vary depending on the type of fabric you are using: coarse fabrics require more layers than finely meshed fabrics. For much coarser fabrics, apply the ink directly from the container with the brush, or use a paint roller instead of a brayer.
PRO TIP: If the ink begins to dry, mist the ink slab with a thin coat of water to reactivate it before loading the brayer or paint roller.
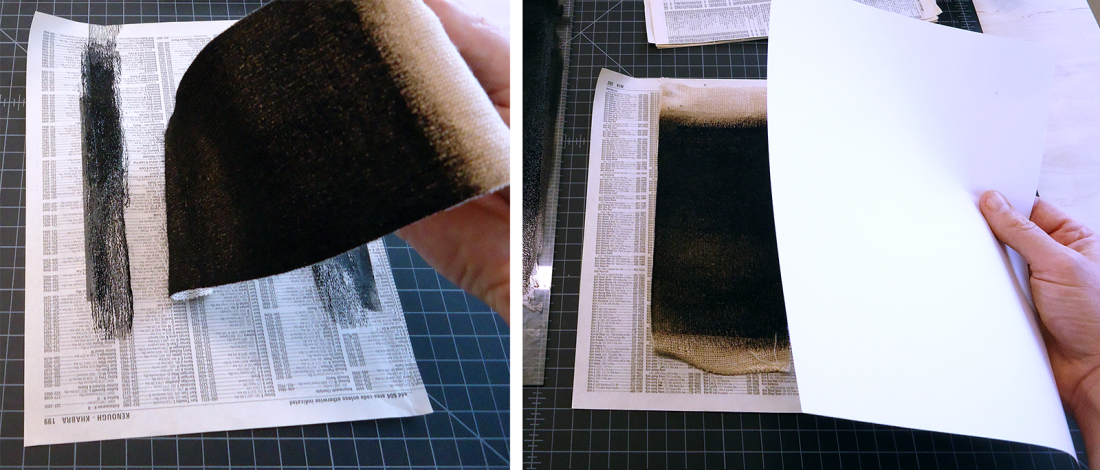
STEP 4: LIFT THE INK ONTO A PAPER SURFACE BY BURNISHING IT WITH A SPOON
Take your ink-coated fabric and place it on a clean surface before covering it with the paper to be printed. Make sure to place the inked area of your fabric in the right location of your paper, especially if you plan on coating the paper with different examples of fabric textures.
Using the back of the spoon, rub down firmly over the fabric in a circular motion. While moving the spoon in circles, push it over all parts of the fabric that has been inked up, making sure to take extra care and adding more pressure if the fabric has bumps or creases and seams.
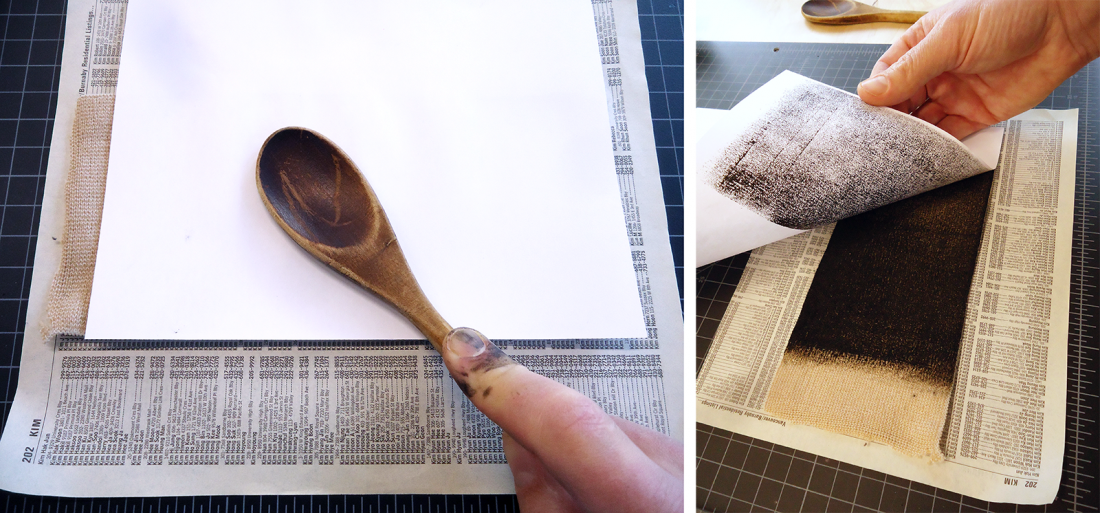
Once finished, carefully lift a corner of the paper to see if the ink has transferred onto the surface of the paper. If the ink is light, continue burnishing until most of the ink has been lifted to the paper.
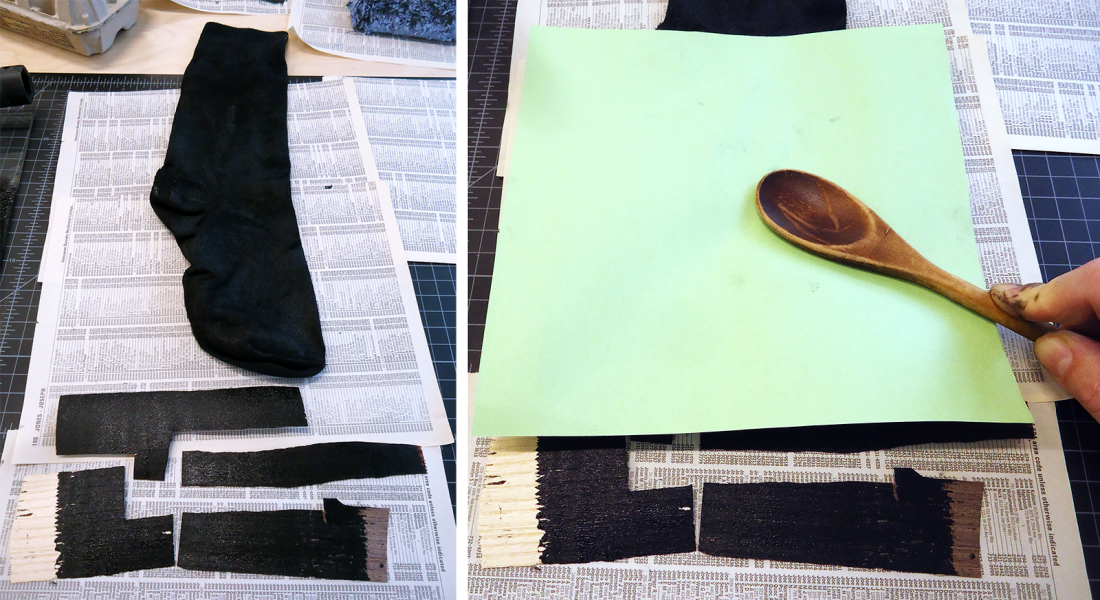
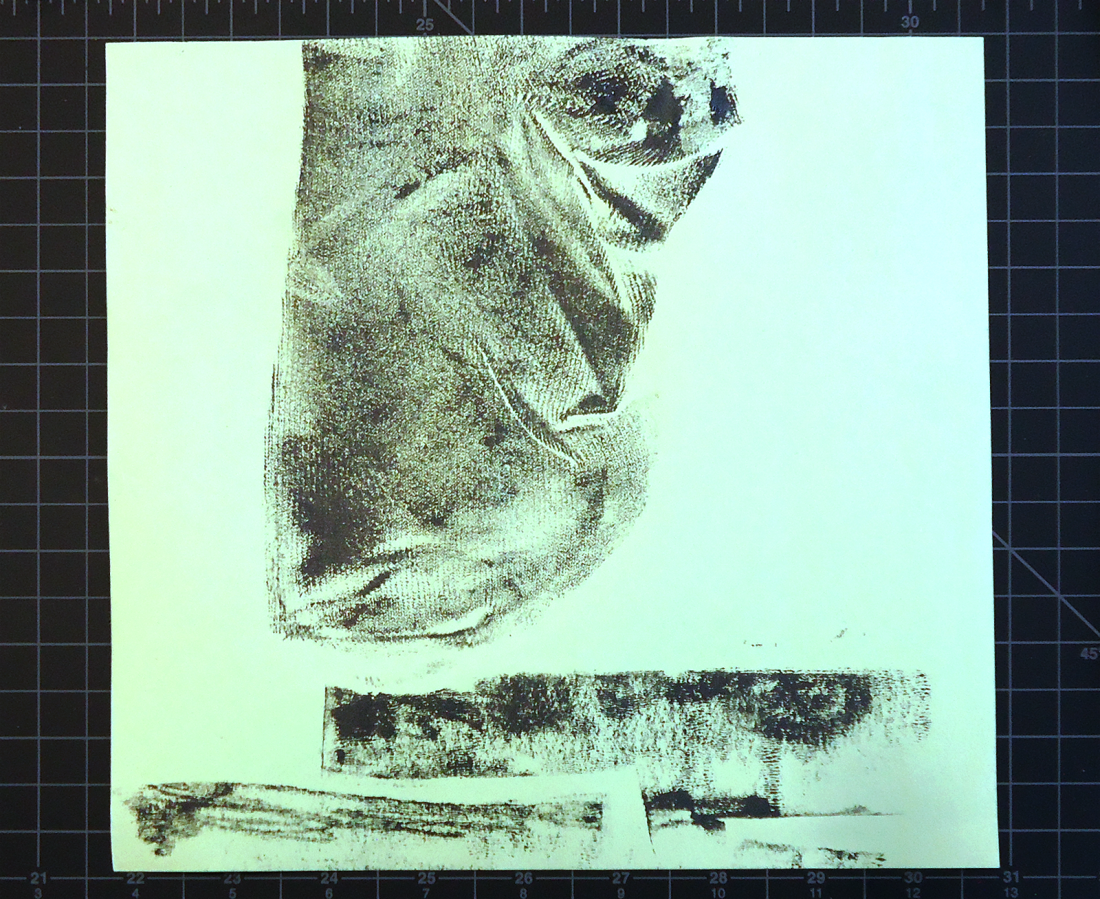
STEP 5: TRY AN ALTERNATE FABRIC, OR USE SEVERAL TEXTURES TO MAKE ONE IMAGE
Your first image should be made to test out how to best print different fabrics using the various tools and techniques, such as the white print of three different fabrics below: elastic bandage (left), face cloth (top right) and sock tip (bottom right).

Once you have become comfortable with monoprinting, try composing an image that is more dynamic, that has layered sections, or that carries a message. Use other materials such as wood or cardboard to add even more details, or experiment with coloured paper.
STEP 6: SHARE YOUR WORK
If you share your work online, be sure to tag @polygongallery as we would love to see your printed results.
Join us on Saturday, December 5th in order to experiment with more printmaking techniques, while learning how to frame your prints in different ways. See you here next week!